CREATE YOUR OWN METALLIC FISH WITH DERWENT PAINT PANS
Enjoy another step-by-step guide from our Head of Design Naj Ellwood. Enjoy watching her use Derwent Paint Pan Sets to create her own metallic shoal of fish.
I’ve been exploring a range of little things in watercolour recently in a bid to fill as many postcards to send out as I can. Whist I’m pretty set on my basic process I’m always up for mixing up my techniques slightly to add a bit more of a challenge. I also really enjoy painting on-the-go so wanted to explore some more portable options this time.
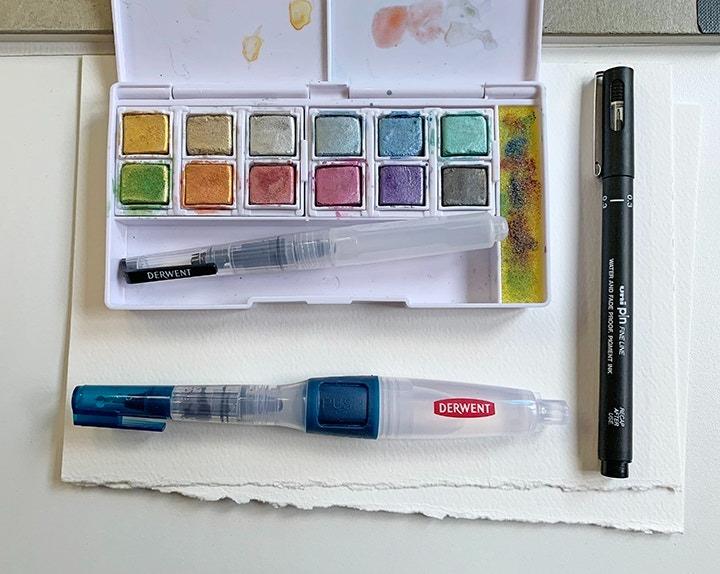
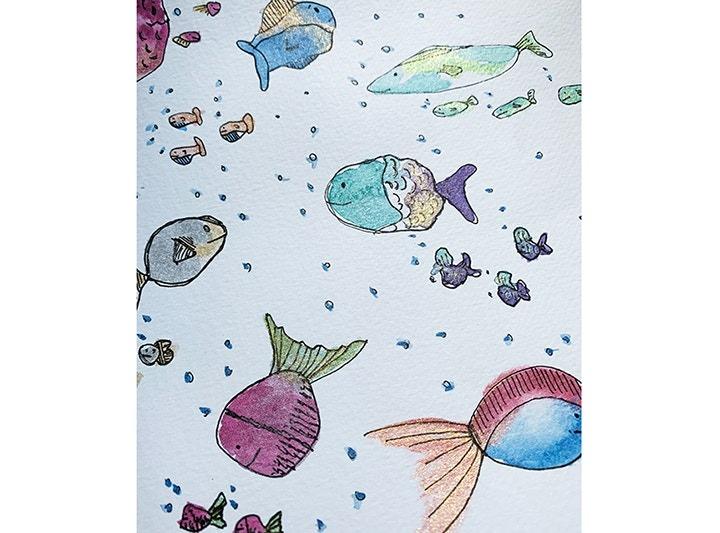
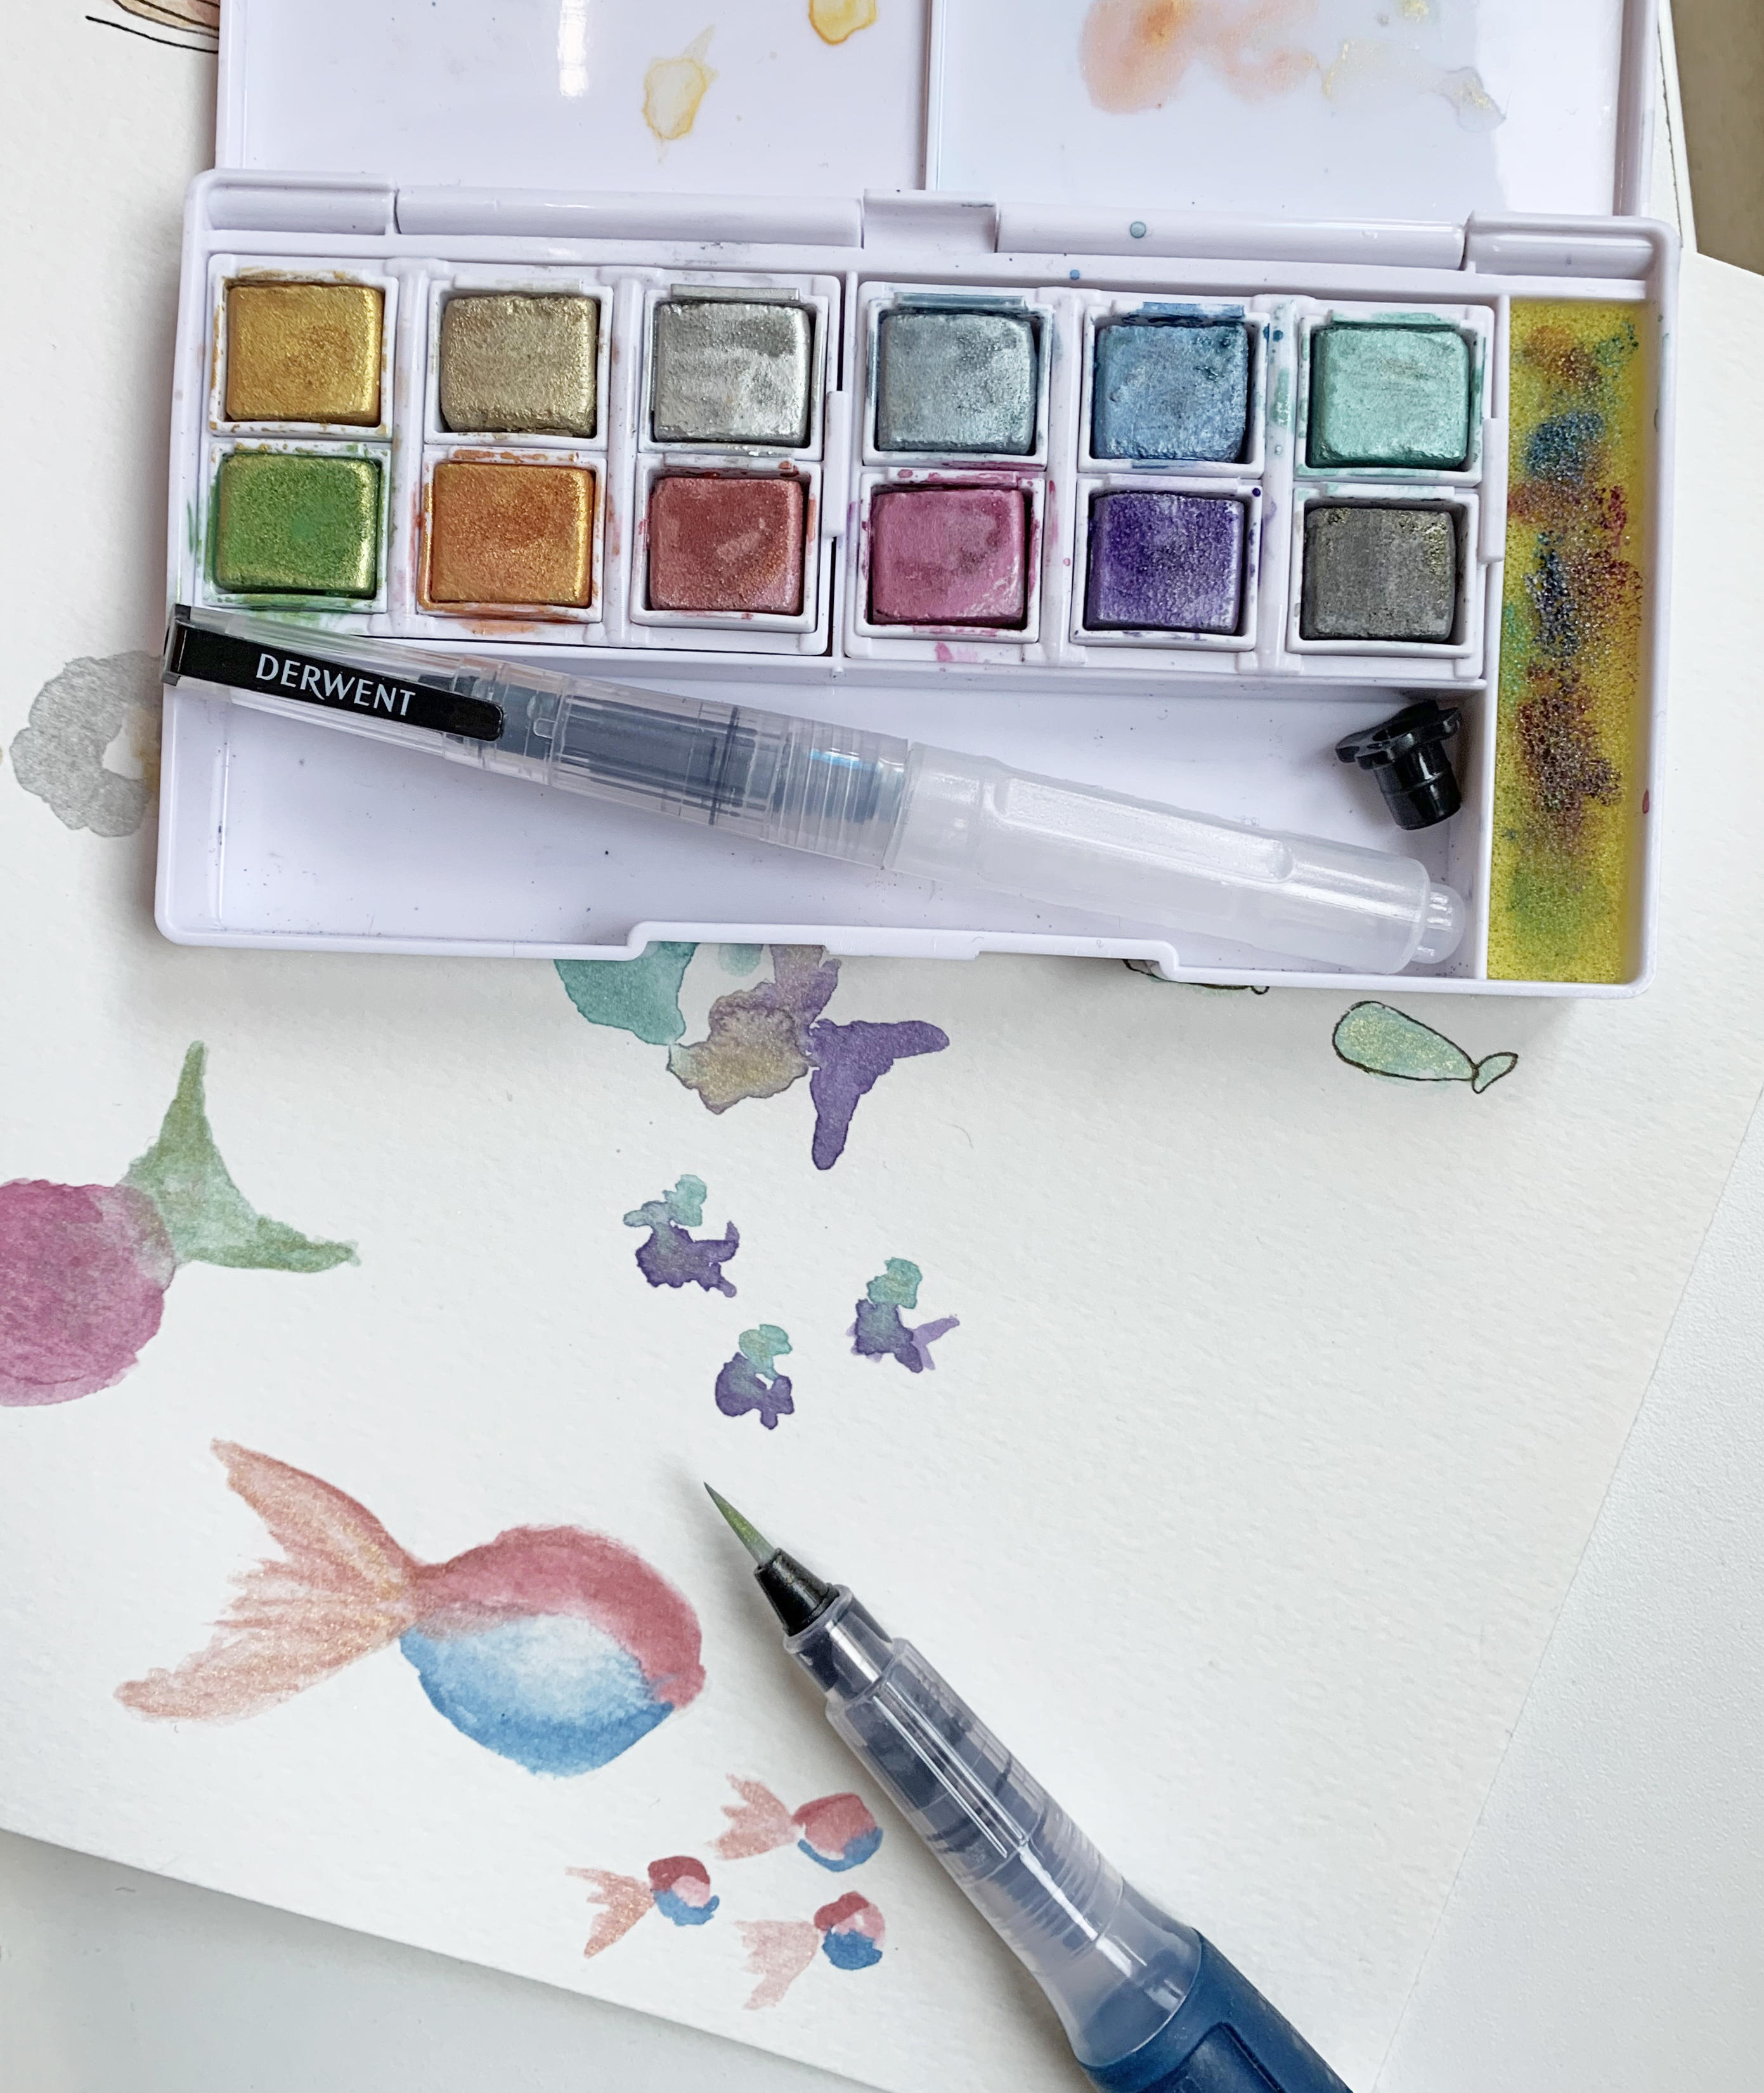
So today I’m going to share my little fish families made with Derwent’s metallic paint pan set - they are the perfect mix of pastel shades with sparkly jewel-like colours, ideal for the fish! I’m also trying out the push pen water brushes... these are great for on the go painting and can also be filled with ink. You can control the flow of water coming through the brush tip with the handy click button. I found it helpful to test these out with the water flow and adjust/dry off to my preference. I usually prefer a drier brush but really enjoyed the immediate effect of adding water to change the texture as I was painting. Another cool thing is you can run the water through the brush to clean it, meaning no need to rinse in between colour changes.
STEP 1
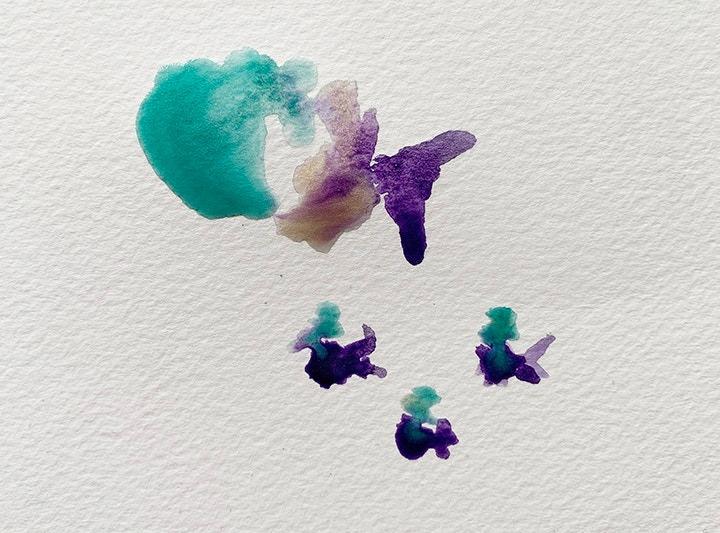
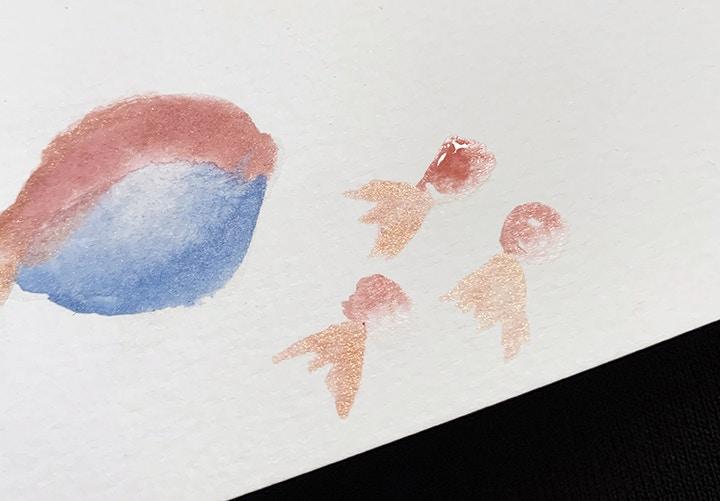
Make the basic fish shape... they can be any shape you like. I’ve made a large fish with three smaller ones to join each family. I tried a few different ways of doing this, making little pools of water using the drip crates by simply squeezing the waterbrush. Then really loading up the brush with pigment, use this to colour the water and see what happens when it dries. Each time I do this, they come out a little different, that’s the beauty of it.
STEP 2
Make the basic fish shape... they can be any shape you like. I’ve made a large fish with three smaller ones to join each family. I tried a few different ways of doing this, making little pools of water using the drip crates by simply squeezing the waterbrush. Then really loading up the brush with pigment, use this to colour the water and see what happens when it dries. Each time I do this, they come out a little different, that’s the beauty of it.
STEP 3
Wait for them to dry. You may like to layer up more colour to add intensity.
STEP 4
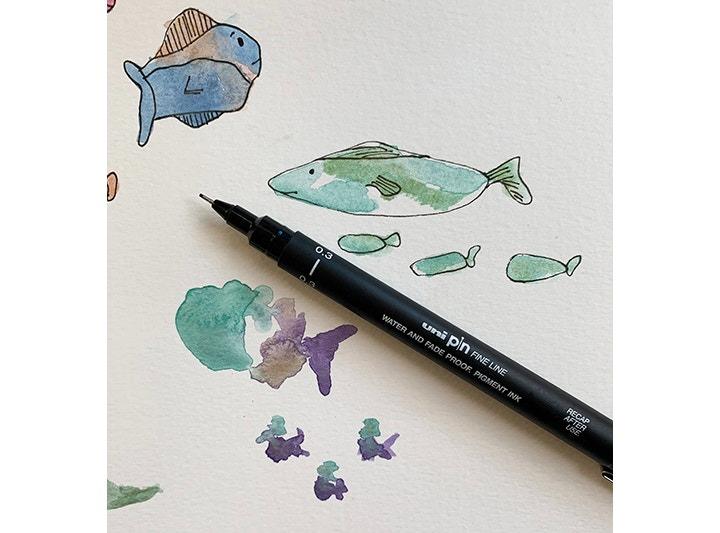
Now it's time to add in the details! Using a fineliner you can give them some personality and flair creating something totally unique! Give each family their own character and style or even add in other sea life.
And voila! Experiment with adding different shaped fish and then perhaps extend to a full underwater scene...
FEELING INSPIRED?
Share your work with us by tagging us @cassart1984 or using the hashtag #cassart